How to Upgrade a Bathroom on a Budget

Time:2026-09-30 Author:Mason
0%

A bathroom upgrade does not require a full demolition or a luxury-sized budget. Learning how to upgrade a bathroom on a budget starts with controlling scope, preserving the existing layout, and choosing improvements that create visible daily value. Keep the toilet, sink, and shower in place whenever possible. Moving plumbing can quickly consume money needed for lighting, storage, or safer flooring.

The U.S. Environmental Protection Agency’s WaterSense program reports that certified bathroom fixtures use at least 20% less water than standard models. A WaterSense showerhead, a fresh mirror, and brighter LED lighting can change the room without disturbing its walls. The National Kitchen & Bath Association’s 2024 design research also highlights storage, wellness, and practical accessibility as continuing bathroom priorities. These findings support a useful strategy: improve function before decoration.

Renovation expert Tom Silva often repeats the rule, “Measure twice, cut once.” It fits budget remodeling perfectly. Measure the vanity opening, tile area, door swing, and plumbing connections before purchasing anything. Small errors become expensive quickly. A new faucet may not fit the old supply lines. A bargain vanity may block the bathroom door. This guide will examine affordable upgrades, realistic material choices, and tasks worth handling yourself. It will also question some popular advice. Paint is not always the cheapest answer when moisture has already damaged the wall. A budget is not a magic shield. Good planning is less exciting, but it usually prevents the most painful surprises.
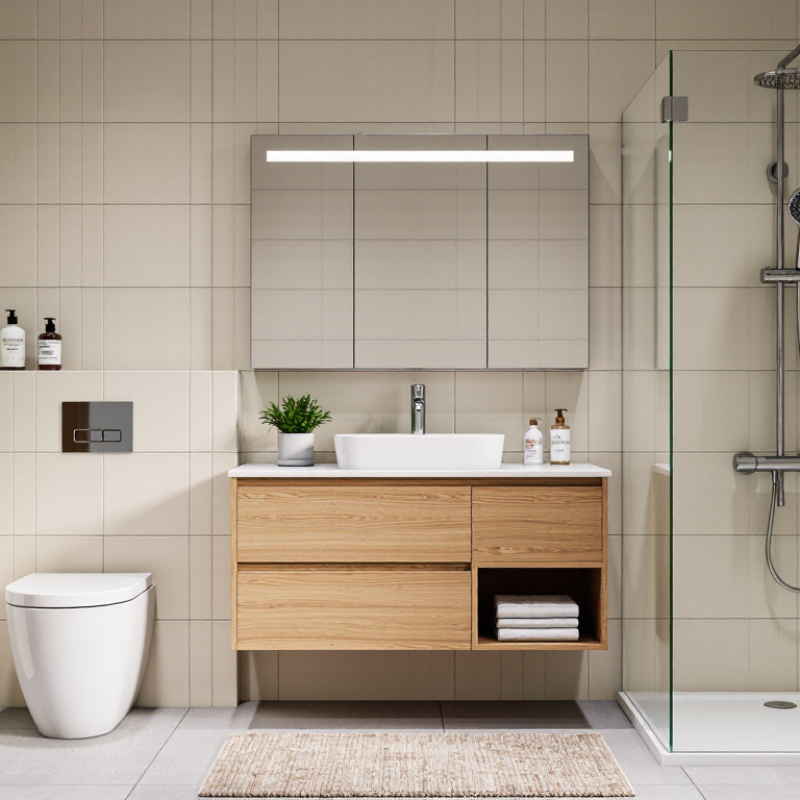
How to Upgrade a Bathroom on a Budget

Assess the Bathroom and Set a Realistic Budget

How to Upgrade a Bathroom on a Budget

Assess the bathroom before choosing new finishes. Check the ceiling, grout, caulk, flooring, and cabinet bases for stains or swelling. A slow leak behind a wall can turn a cosmetic project into an expensive repair. Test the exhaust fan, too. Poor ventilation often causes peeling paint and persistent mildew.

Measure the room carefully, including door swings, plumbing points, and wall openings. Write down every necessary repair before pricing decorative changes. Separate essentials from wishes. Replacing a damaged toilet seal is essential; changing a mirror may wait. Set a realistic budget by collecting several local labor estimates and adding 15–20 percent for surprises. I have learned that small bathrooms still hide costly problems. My first estimate once ignored disposal fees and extra fittings.

Tips: Photograph hidden connections before removing anything. Keep a simple spreadsheet for materials, labor, delivery, and waste. Choose durable, moisture-resistant products rather than the cheapest option. If wiring, structural damage, or major plumbing needs attention, consult a qualified professional. That expense protects the project and your home. Avoid borrowing from the repair budget for decorative upgrades. A clean repaint may feel less exciting, but it can preserve money for urgent work.

Prioritize High-Impact, Low-Cost Improvements

How to Upgrade a Bathroom on a Budget

Prioritize High-Impact, Low-Cost Improvements

A budget bathroom upgrade should begin with surfaces people notice every day. When I refreshed a small bathroom, I cleaned the grout before buying anything. The change was surprisingly visible. A stiff brush, mild cleaner, and several patient passes removed years of dull buildup. Some stains remained, which taught me not to promise perfect results.

Next, improve lighting and hardware. Replacing an outdated ceiling bulb with a brighter, suitable fixture can make the room feel cleaner. Check electrical requirements carefully, and ask a qualified professional for help when necessary. New drawer pulls, towel hooks, and a matching toilet paper holder also create visual order. Measure existing holes before purchasing replacements. My first pull looked attractive but did not fit the cabinet.

Paint can deliver strong impact, but bathroom preparation matters more than color. Repair small cracks, remove loose caulk, and let surfaces dry fully. Choose moisture-resistant materials designed for bathrooms. A soft, light shade may make a narrow room feel larger, while a darker accent wall can add depth. Do not rush the edges. Uneven lines are obvious near mirrors and trim. Replace failing caulk around the tub only after removing residue completely. Otherwise, the new bead may peel early. A washable fabric shower curtain, framed mirror, and one wooden stool can add warmth without major construction. The stool may need sealing, though I overlooked that at first.

How to Upgrade a Bathroom on a Budget

Prioritize small fixture upgrades that reduce water use without changing the bathroom layout. Replacing an older showerhead, faucet aerator, or toilet can deliver measurable efficiency improvements while keeping material and installation costs relatively low.

Flow-rate figures are based on common residential fixture standards and efficiency thresholds published by the U.S. Environmental Protection Agency.

Refresh Surfaces, Fixtures, and Storage

A budget bathroom upgrade starts with surfaces, not demolition. Repaint moisture-prone walls with a washable coating, then replace cracked grout around the tub. A small test area prevents expensive color mistakes.

I once chose a pale finish without checking the room’s lighting. It looked cold at night. That mistake still bothers me.

Refresh fixtures selectively. A new faucet, showerhead, and cabinet hardware can change the room’s character without moving plumbing.

EPA WaterSense specifications show that efficient showerheads use no more than 2.0 gallons per minute, while maintaining required performance standards.

Efficient toilets use 1.28 gallons per flush or less, compared with older models that may use 3.5 gallons or more.

Check pipe conditions before installation. Cheap fittings become costly when leaks reach the vanity.

Storage deserves equal attention. The 2024 U.S. Houzz Bathroom Trends Study reports that homeowners commonly improve functional features during renovations, including vanities, showers, and storage areas.

Add a recessed shelf only if the wall cavity is clear. Otherwise, use a narrow freestanding unit with sealed edges.

Keep daily items between waist and shoulder height.

Open shelves look attractive, but they expose clutter and moisture.

I prefer one drawer for essentials and one closed cabinet for backups.

It is less stylish, perhaps, but easier to maintain.

Photograph hidden plumbing before covering it. Future repairs will thank you.

Complete Safe DIY Updates and Essential Repairs

A budget bathroom upgrade should begin with safety, not paint color. I learned this after finding a slow leak beneath a loose vanity trap. Turn off the water supply and test the faucet before removing fittings. Keep a bucket, towels, gloves, and eye protection nearby. Photograph pipe connections before disassembly. This prevents confusing reassembly later. If a valve will not close, stop and call a licensed plumber.

Repair moisture damage before cosmetic work. Press a screwdriver gently into swollen wood; soft material may signal hidden water. Replace damaged sealant around the tub, but let the surface dry completely first. Clean visible mildew with an appropriate household cleaner and improve ventilation. Never mix cleaning chemicals. Check the exhaust fan and keep air moving during showers. A small floor-level leak deserves attention, even when the ceiling below looks dry. Water travels.

For updates, choose slip-resistant flooring, sealed grout, and a mirror with secure wall anchors. Install grab bars only into suitable structural support, not drywall alone. Bathroom outlets should have ground-fault protection, and electrical changes are safer for a qualified electrician. I once rushed a shelf installation and patched two unnecessary holes. Measure twice. Cut once. Leave access panels reachable, and inspect new joints after twenty-four hours. My checklist is imperfect, so I add a second visual check before using the room normally.

How to Upgrade a Bathroom on a Budget - Complete Safe DIY Updates and Essential Repairs

Plan essential repairs first, then choose cosmetic updates that fit your budget. Costs below are approximate U.S. materials-only estimates; local prices, bathroom size, and existing conditions can change the total.

Project What It Improves or Fixes Typical Materials Cost (USD) Estimated DIY Time Difficulty Safety Notes
Replace worn caulk around a tub or shower Removes failed sealant and helps keep water from reaching nearby walls or flooring. $8–$25 1–3 hours, plus curing time Beginner Remove old caulk and let the joint dry before applying new bathroom-rated sealant. Follow the product label for ventilation and curing time.
Repair a running toilet with a new flapper Can stop water from continuously leaking from the tank into the bowl. $5–$20 30–60 minutes Beginner Shut off the toilet’s supply valve before working. If the valve will not close or leaks, stop and address that problem first.
Replace a showerhead Refreshes the shower and may reduce water use when replacing an older, higher-flow model. $15–$70 30–60 minutes Beginner Check for leaks after installation. Use tools carefully so the shower arm or plumbing connections are not damaged.
Update cabinet pulls or knobs Gives existing vanity cabinets a refreshed appearance without replacing the cabinet. $10–$50 1–2 hours Beginner Measure existing hole spacing before buying hardware. Secure loose handles so they cannot snag clothing or cause injury.
Paint walls or a vanity cabinet Changes the room’s appearance while keeping existing fixtures in place. $30–$120 4–8 hours, plus drying time Beginner to intermediate Ventilate the room and follow paint-label directions. Do not paint over damp, moldy, or damaged surfaces until the underlying issue is corrected.
Replace a bathroom mirror Updates a dated mirror or replaces one with damaged edges. $30–$150 1–3 hours Beginner to intermediate Mirrors can be heavy and break into sharp pieces. Use suitable lifting help and mounting hardware for the wall type and mirror weight.
Replace a faucet aerator or clean a clogged aerator Addresses uneven or reduced flow caused by mineral deposits or debris. $3–$20 15–45 minutes Beginner Protect the drain so small parts cannot fall in. If cleaning does not restore flow, check for other plumbing issues rather than forcing the fitting.
Replace a bathroom faucet Updates the sink area and can resolve a worn faucet when the sink and supply connections are in good condition. $50–$180 2–4 hours Intermediate Turn off both supply valves and check for leaks after installation. Get help if shutoff valves are corroded, stuck, or begin leaking.
Replace a damaged toilet wax ring May correct a leak at the toilet base when the seal has failed. $8–$25 2–4 hours Intermediate A leaking toilet can damage the floor. Stop using it if water is escaping; the toilet is heavy, and a damaged flange may require professional repair.
Improve bathroom ventilation Helps remove moisture when an existing fan is working poorly or ventilation is inadequate. $50–$180 for a replacement fan 2–5 hours Intermediate to advanced Electrical work requires turning off power at the breaker and verifying it is off. Use a qualified electrician if wiring, ducting, or code requirements are uncertain.

Repair priority: Fix active leaks, persistent dampness, loose fixtures, and ventilation problems before cosmetic updates. These estimates exclude labor, tools, permits, and any hidden damage; consult a qualified professional for significant water damage, suspected hazardous materials, or work beyond your skill level.

Add Finishing Touches Without Increasing Costs

An inexpensive bathroom can still feel carefully finished when small details work together. After updating several rental bathrooms, I have found that texture matters more than expensive materials. Washable cotton towels, a plain woven basket, and a small wooden stool add warmth without crowding the room. Choose two coordinating colors, then repeat them in towels, storage containers, or a simple shower curtain. Repetition creates order.

Keep the counter nearly clear. A glass jar can hold cotton pads, while another container hides spare soap. Use what you own before buying something new. An old tray may become a neat place for daily essentials after thorough cleaning. Never place untreated wood beside standing water. Moisture quickly exposes cheap shortcuts.

Lighting changes the room’s mood, but it does not require major rewiring. Clean the existing fixture, replace a stained shade, or add a small lamp outside wet areas. Follow local electrical rules, especially around sinks and showers. Soft, even light makes inexpensive tiles appear more intentional.

Hooks can replace bulky towel racks and usually need little wall space. My first bathroom refresh looked too decorated because I filled every empty corner. I later removed two accessories, and the room felt calmer. Leave some space between objects. It makes useful items look deliberate rather than forgotten.

Check grout, cabinet handles, and mirror edges before spending money on decoration. A careful scrub and a tightened screw may improve the room more than another purchase.

FAQS

How can I refresh a bathroom without major demolition?

Repaint moisture-prone walls with washable coating and replace cracked grout around the tub. Test a small area first.

How do I choose a suitable wall color?

Check the room in daylight and at night. A pale color may look cold under evening lighting.

Which fixtures create the biggest visible improvement?

Replace the faucet, showerhead, or cabinet hardware selectively. Plumbing usually stays in place.

What water-efficiency details should I check?

Choose a showerhead using no more than 2.0 gallons per minute. Efficient toilets use 1.28 gallons per flush or less.

How can I avoid leaks after installing new fittings?

Inspect pipe conditions before installation. Keep a bucket nearby and check every joint after twenty-four hours.

What storage works well in a small bathroom?

Use a recessed shelf only when the wall cavity is clear. Otherwise, choose a narrow unit with sealed edges.

Should I choose open shelves or closed storage?

Open shelves show clutter and collect moisture. One essentials drawer and one closed cabinet may be easier to maintain.

What safety checks should happen before cosmetic updates?

Turn off the water and test the faucet. Keep gloves, towels, eye protection, and a bucket nearby.

How should I handle moisture damage and ventilation?

Replace swollen wood and damaged sealant after the surface dries. Clean visible mildew safely, improve airflow, and never mix cleaners.

When should I call a qualified professional?

Stop if a valve will not close. Electrical changes and uncertain plumbing connections need qualified help.

Conclusion

Learning how to upgrade a bathroom on a budget starts with a careful assessment of the space and a realistic spending plan. Identify urgent repairs, measure the room, and decide which changes will create the greatest visual and practical impact. Focus first on affordable improvements such as deep cleaning, fresh paint, updated hardware, improved lighting, and better organization. Refreshing worn surfaces, replacing dated fixtures, and adding simple storage can make the room feel more modern without requiring a full renovation.

Complete only safe DIY tasks, and seek qualified help for electrical, plumbing, or structural problems. Small repairs should be handled before decorative updates to prevent future costs. Finally, add low-cost finishing touches such as coordinated towels, a clean shower curtain, mirrors, plants, or homemade artwork. With thoughtful planning, careful prioritization, and a focus on function, a bathroom can look brighter, cleaner, and more comfortable while staying within a modest budget.

Mason

Mason

Mason is a seasoned marketing professional with a deep expertise in the company's offerings and a passion for driving brand awareness. With a strong background in digital marketing strategies, he has an innate ability to connect with diverse audiences and effectively communicate product benefits.......